MetaMask Delegation Toolkit Agent
🌟 Overview
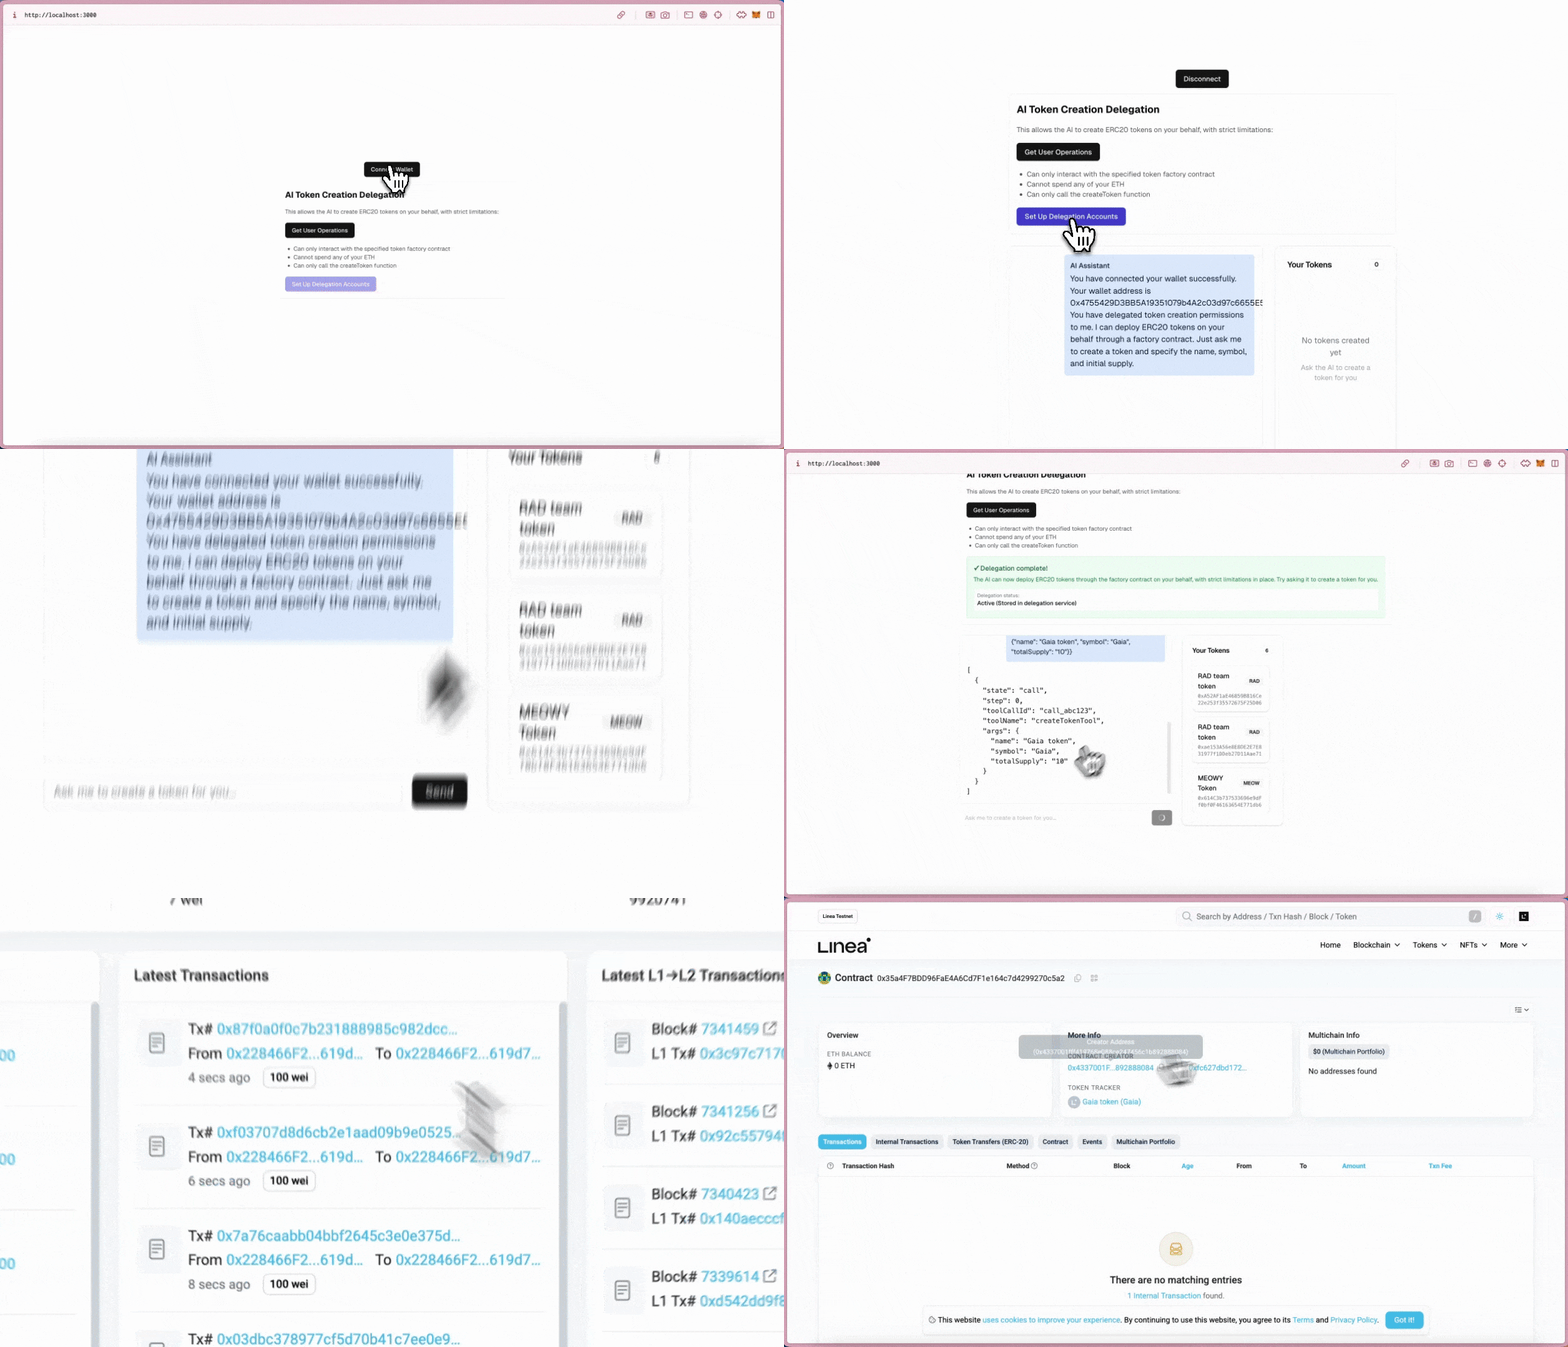
The MetaMask Gaia DTK Starter is a powerful Next.js template that seamlessly integrates Gaia's advanced capabilities with MetaMask's Develegation Toolkit (DTK). This project allows developers to build sophisticated blockchain applications with AI-enhanced functionalities while leveraging MetaMask's secure wallet infrastructure.

The starter includes a full ERC20 token creation system through an integrated factory contract, allowing users to deploy custom tokens directly through the application. Combined with AI-powered interactions, this creates a powerful platform for building next-generation decentralized applications.
✨ Features
- AI-Powered Interactions: Utilize GaiaNet AI to create intelligent and responsive dApp experiences
- ERC20 Token Creation: Create custom ERC20 tokens through the integrated factory contract
- Secure Blockchain Integration: Connect with the Ethereum ecosystem through MetaMask's trusted wallet infrastructure
- Delegation Management: Metamask's Delegation Toolkit for managing user-to-AI agent delegations
- Bundler Service Integration: Pre-configured connection to bundler services for transaction handling
- Modern UI Components: Ready-made UI components including chat interfaces, cards, and inputs
- Next.js App Router: Built on Next.js 13+ with the new App Router architecture
- TypeScript Support: Full TypeScript integration for type safety and better developer experience
🚀 Getting Started
Prerequisites
- Node.js (v16 or later)
- pnpm package manager
- MetaMask extension installed in your browser
Installation
- Clone the repository:
git clone https://github.com/meowyx/metamask-gaia-starter.git
- Navigate to the project directory:
cd metamask-gaia-starter
- Install dependencies using pnpm:
pnpm install
- Create a
.envfile in the root directory with the following configuration:
# Factory contract configuration
NEXT_PUBLIC_FACTORY_CONTRACT_ADDRESS=0x...
NEXT_PUBLIC_CREATE_TOKEN_SELECTOR=0x...

# Bundler service configuration
NEXT_PUBLIC_BUNDLER_URL=https://api.pimlico.io/v2/137/rpc?apikey=YOUR_API_KEY
NEXT_PUBLIC_CHAIN_ID=59141

# Infura and private key configuration
INFURA_PROJECT_ID=your_infura_project_id
PRIVATE_KEY=your_private_key

# Delegation storage configuration
NEXT_PUBLIC_DELEGATION_STORAGE_API_KEY=your_delegation_api_key
NEXT_PUBLIC_DELEGATION_STORAGE_API_KEY_ID=your_delegation_api_key_id
NEXT_PUBLIC_DELEGATION_STORAGE_ENVIRONMENT=development

# Gaia AI configuration
GAIA_MODEL_BASE_URL=your_gaia_model_url
GAIA_API_KEY=your_gaia_api_key // not needed if you run your own node
- Start the development server:
pnpm dev
- Open http://localhost:3000 in your browser to see the application running.
📖 Project Structure
├── .next/             # Next.js build output
├── ai/                # AI-related utilities
│   └── tools.ts       # AI tools implementation
├── app/               # Next.js App Router
│   ├── api/           # API routes
│   ├── globals.css    # Global styles
│   ├── layout.tsx     # Root layout component
│   └── page.tsx       # Home page component
├── components/        # Reusable UI components
│   ├── ui/            # Basic UI components
│   │   ├── badge.tsx  # Badge component
│   │   ├── button.tsx # Button component
│   │   ├── card.tsx   # Card component
│   │   └── input.tsx  # Input component
│   ├── Chat.tsx       # Chat interface component
│   ├── DelegationManager.tsx # Delegation management component
│   └── Message.tsx    # Message component
├── lib/               # Utility functions and libraries
├── services/          # API services
│   ├── account.ts     # Account-related services
│   ├── bundler.ts     # Bundler service implementation
│   └── utils.ts       # Service utilities
├── public/            # Static assets
│   ├── file.svg       # File icon
│   ├── globe.svg      # Globe icon
│   ├── next.svg       # Next.js logo
│   └── vercel.svg     # Vercel logo
├── node_modules/      # Dependencies
├── .env               # Environment variables
├── package.json       # Project dependencies
└── pnpm-lock.yaml    # pnpm lock file
🔧 Configuration
ERC20 Factory Contract Setup
This project integrates with the ERC20 Factory Contract to enable token creation capabilities. Follow these steps to set up the integration:
-
Clone and deploy the ERC20 Factory contract:
git clone https://github.com/meowyx/erc20-factory
cd erc20-factory
npm install
npx hardhat compile
npx hardhat ignition deploy ignition/modules/tokenFactory.ts --network linea-testnet -
After deployment, update your
.envfile with the deployed contract address:NEXT_PUBLIC_FACTORY_CONTRACT_ADDRESS=0x... # The deployed factory contract address
NEXT_PUBLIC_CREATE_TOKEN_SELECTOR=0x... # The function selector for createToken -
Update the
constants.tsfile with the ERC20 Factory ABI:// Add the ERC20 Factory ABI to your constants.ts file
export const FACTORY_ABI = [
// ... ABI contents from the compiled contract
{
"inputs": [
{"internalType": "string", "name": "name", "type": "string"},
{"internalType": "string", "name": "symbol", "type": "string"},
{"internalType": "uint8", "name": "decimals", "type": "uint8"},
{"internalType": "uint256", "name": "initialSupply", "type": "uint256"}
],
"name": "createToken",
"outputs": [{"internalType": "address", "name": "", "type": "address"}],
"stateMutability": "nonpayable",
"type": "function"
}
// ... other ABI entries
]; -
The factory contract allows you to create new ERC20 tokens with custom parameters such as name, symbol, decimals, and initial supply.
The ERC20 Factory project structure:
erc20-factory/
├── contracts/
│   ├── BaseERC20Token.sol   # Base token implementation
│   └── ERC20Factory.sol     # Factory for deploying tokens
├── test/
│   └── ERC20Factory.test.js # Test scripts
├── ignition/
│   └── modules/
│       └── tokenFactory.js  # Deployment configuration
├── hardhat.config.js        # Hardhat configuration
└── package.json             # Project dependencies
MetaMask Setup
- Install the MetaMask extension in your browser
- Create or import a wallet
- Connect your dApp using the provided hooks in the starter
Gaia Integration
- Sign up for an API key over here
- Add your API key to the
.envfile underGAIA_API_KEY - Set the model base URL in the
.envfile underGAIA_MODEL_BASE_URL - Use the pre-configured AI tools in
ai/tools.tsto interact with GaiaNet features
Bundler Service Configuration
- Get an API key from Pimlico or your preferred bundler service
- Add the bundler URL to the
.envfile underNEXT_PUBLIC_BUNDLER_URL - Set the correct chain ID in the
.envfile underNEXT_PUBLIC_CHAIN_ID
Delegation System Setup
- Configure the delegation storage API keys in the
.envfile - Use the
DelegationManager.tsxcomponent to manage delegations between users and AI agents
📚 Documentation
For more detailed information about the technologies used in this starter:
🙏 Acknowledgements
- MetaMask Delegation Toolkit for their Delegation Toolkit.
- Gaia for their AI platform
- Next.js for the React framework
- Vercel AI SDK for The AI Toolkit for TypeScript